3 Ingenious Ideas For Recycling Tin Cans
With a little imagination and a few tips, you can take care of the planet and design a magnificent decorative element that is at the same time different, ecological and economical from simple cans.
We offer you here 3 original ideas for making many decorative elements from tin cans: no doubt you have plenty of them at home! Indeed, did you know that a person throws away about 13 kilos of aluminum or tin cans every year?
Today we are starting to realize the importance of recycling and finding another use for these objects which are very often not recycled and pollute us. Indeed, our goods take a long time to degrade: 50 to 100 years for a tin can… and up to 500 years for a disposable diaper! This is the reason why we suggest that you collect and wash your used tin cans, dry them well and make magnificent creations of them.
Since cans are made of a strong and durable material, they can easily be transformed into a wide variety of objects for various uses, such as jars, small storage and even curtains. Because if it is solid, this material is also very easy to use.
3 ideas for recycling cans
With very few materials, using what you have at home, you can easily make original objects. For starters, take a look at these food boxes with new eyes: yes, you can find them loads of new functions and decorate them tastefully.
Make pretty candlesticks
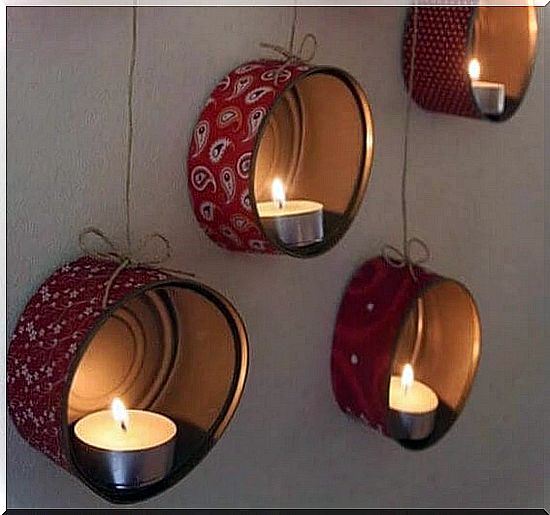
This creation is ideal for dressing up a romantic and welcoming little corner. It is very simple to achieve and the light produced is so soft that you will not believe your eyes. To carry out this project, it is better to get some small aluminum cans. This way, the candle will be clearly visible rather than obscured by high edges.
Equipment
- 4 small cans
- 4 tea lights
- 2 colored paper napkins
- A ruler
- Glue
- A knife
- Scissors
- 4 nails
- 2 meters of natural fiber rope
How to do it ?
- First, measure the exact height of the tin can.
- Then, transfer this measurement to a pretty decorative paper or just thick paper napkins with a pattern you like.
- Glue the paper to the outer part of the box.
- Make a hole in the bottom of the box using the nail or scissors.
- Pass a piece of rope through the hole (50 cm in length) and tie a knot that you will wedge behind the hole.
- Place a nail in the wall and secure the other end of the rope to it.
- Repeat the operation for all the candlesticks. For a more stylish effect, attach them to the wall at different heights.
- Finally, place a candle in each of the candle holders and light them.
Organize your office
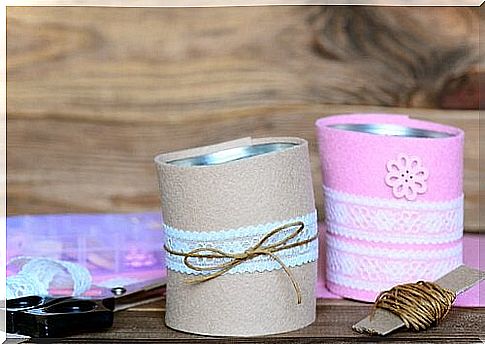
With taller aluminum boxes, it is possible to imagine a bunch of pretty little decorative storage where you can put your office equipment. You are free to choose boxes of different diameters!
Equipment
- 2 high-sided tins
- White paint
- Decorative paper (thick paper towel type)
- White glue
- Some water
- A container
- 2 brushes
- Paint in the desired color
- Decorative ribbon
- 10 cm of fine natural fiber rope
How to do it ?
- First, paint the boxes white. Apply two coats and let dry.
- Cut strips in the colored paper to make different tabs.
- In a container, mix glue with water, in equal amounts.
- Mix well with the brush.
- Then, using the brush, glue the pieces of paper on the boxes using the resulting mixture.
- Leave to dry for 12 hours.
- Paint in the desired color and let dry.
- Tape decorative ribbon around the pot.
- Finally, place the rope around the ribbon and tie a knot in front.
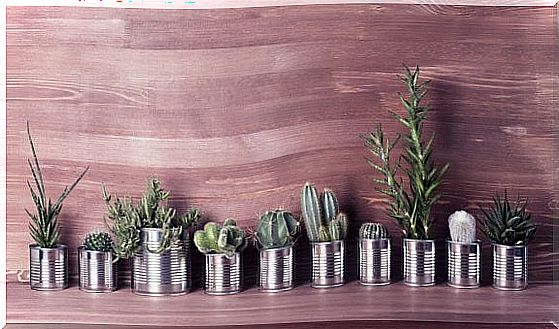
Create your wall flower pots
This idea is perfect for dressing up a garden or balcony in the Greek style. Discover our ideas for designing a pleasant and aesthetic corner that will take you on a trip thanks to the shades of blue and green vegetation.
Equipment
- 1 pallet
- 8 cans
- “Lilac” paint
- Blue paint
- 8 plants
- Nails
- 2 brushes
- A golden marker
How to do it ?
- Start by painting the palette in lilac.
- Nail the pallet to the wall.
- Then paint all the cans with the other jar of blue. Apply two or three coats of paint and let dry.
- Draw branches or leaves on the boxes using the gold marker.
- Do not forget to perforate the bottom of the boxes to allow the water to drain.
- Then, with a nail, secure each box to the pallet in a random fashion.
- Finally, place your plants in the pots and moisten the soil.
So don’t get rid of your empty cans and create your first items! In addition, this approach helps to preserve water and soil in our regions. So get started now!